-
Adopt
-
Veterinary Care
Services
Client Information
- What to Expect – Angell Boston
- Client Rights and Responsibilities
- Payments / Financial Assistance
- Pharmacy
- Client Policies
- Our Doctors
- Grief Support / Counseling
- Directions and Parking
- Helpful “How-to” Pet Care
Online Payments
Emergency: Boston
Emergency: Waltham
Poison Control Hotline
-
Programs & Resources
- Careers
-
Donate Now
 By Kiko Bracker, DVM, DACVECC
![]()
angell.org/emergency
emergency@angell.org
617-522-7282
Feline (de)obstipation
Obstipation is the inability to pass stool and it is a permanent condition. Constipation is difficult or infrequent passage of feces. Obstipation is quite uncommon in the dog, and is usually a result of eating bones/bone fragments, colonic tumors, or pelvic fractures. Dogs do not get idiopathic megacolon like cats do. Obstipation is a fairly common problem in cats. It usually affects cats in middle to older ages. The most common cause of obstipation in the cat is idiopathic megacolon, but pelvic fractures and colonic tumors affecting the outflow of stool can also be seen with some frequency. The cause of feline idiopathic megacolon is not entirely understood. Although it is suspected to be a problem of smooth muscle, both the colonic innervation and the myoneural junction have been proposed as the location of the pathology causing this issue.
 There has been no identified cure or definitive treatment for feline idiopathic megacolon. Medical management has been reported to be ‘unrewarding’ which is likely because the problem is typically progressive regardless of treatment and management strategies are minimally effective at improving colonic motility. Medical management strategies include feeding a high fiber diet – often canned food to improve water intake, laxatives, occasional enemas, and occasional deobstipation. The most effective laxatives are Lactulose (1-3ml with food 1-2 times daily to achieve desired stool consistency) and Miralax (polyethyleneglycol) which is often given as 1/8-1/4 of a teaspoon mixed with food twice daily. Miralax tends to be very well tolerated by cats, and it is not messy or sticky – both disadvantages of Lactulose. Both of these medications are osmotic laxatives. The only medication that is really useful to improve colonic contractions is Cisapride. Cisapride is no longer available on the human market due to some cardiac arrhythmias that were noted in people. It can still be bought from some compounding pharmacies for veterinary use. It is typically given as 1mg/kg PO TID, but the range is 0.5-1.0mg/kg BID-TID depending on the patient. Erythromycin at 0.5-1.0mg/kg BID-TID (well below the antibiotic dose) and Ranitidine 1-2mg/kg BID have some mild promotility effects on the colon but do not seem to be as effective as Cisapride.
Once medical management fails, a sub-total colectomy can be performed where most of the colon is removed leaving only a few centimeters of distal colon adjacent to the rectum. The ileocecocolic junction is also sometimes removed in this surgery to allow adequate anastomosis of bowel. This procedure is met with very good results with the vast majority of cats having some diarrhea for 1-12 weeks, but then passing normal stool. Occasional constipation is reported, but it is usually easy to relieve by enemas, stool softeners, and digital manipulation of stool. Stricture formation at the anastomosis site is also rarely reported.
Manual deobstipation under anesthesia is often required in animals whose medical management is not adequate to keep the colon free of collecting stool. Once a cat has not defecated for more than 7 days, the stool is typically so hard and the colon so dilated that no amount of stool softeners or pro-motility agents will allow passage of the stool with assistance. In fact, these patients effectively have a colonic obstruction and promotility agents and some strong laxatives may be contraindicated due to severe discomfort and the risk of colonic perforation.
Before deobstipating a patient, it is helpful to give a few enemas (40-60ml of warm water and KY jelly) and some SQ fluid overnight. This will help to soften the stool making the removal process easier – and sometimes to everyone’s delight (!) the stool passes on its own after an enema or two.
Patients should be fully anesthetized and intubated in order to effectively deobstipate them. This is due to the discomfort associated with the procedure in awake patients, and the need for aggressive manipulation of the abdomen and the stool in order to break it apart and retrieve it from the rectum. It is helpful to have a water reservoir hanging above the table to use as an enema during the procedure. An enema bag from a pharmacy will work well for this purpose. An IV fluid bag with warm saline may work but will only flow very slowly. A large diameter (12-14 fr) red rubber catheter is then connected to the warm water reservoir via some flexible rubber tubing. Have plenty of KY jelly available to coat the red rubber catheter, several towels to wipe stool off your hand, and a large garbage can to drop stool into. Wrapping the cat’s tail in VetWrap will help prevent soiling of the tail during the procedure.
Deobstipation Procedure:
- Patient’s legs pointing toward you.
- Your dominant hand is your ‘dirty’ hand. The other hand never touches stool.
- Avoid using forceps for stool retrieval. It’s dangerous.
- Put KY on your finger every time before going into the rectum.
- With your index finger break apart and retrieve pieces of the most distal stool. Even chipping off small pieces from the edge is helpful. If your finger can be inserted into the middle of the mass of stool then larger pieces can be broken off.
- Use the enema set up to instill 60ml of warm water to ‘flow’ the remaining stool toward the rectum. Putting the enema fluid high up into the colon is helpful for this purpose.
- With your ‘clean’ hand gently push stool toward the rectum by palpation.
- Go back to step 5 until the water coming out of the rectum is clear and no more stool is palpable.
- Milk any residual water out of the colon by gentle caudally-directed abdominal palpation.
- A post-procedure radiograph is rarely necessary if the patient is not obese.
This procedure usually takes about 15-30 minutes depending on experience. Once the patient is awake they rarely pass additional fluid from the rectum if the stool was successfully removed. Patients can be sent home when fully awake, sometimes with an oral antibiotic or an analgesic if the procedure was particularly difficult or blood was noted to be coming out in the rectum during the procedure from mucosal damage. This is generally not necessary, though.
Thyroid Storm
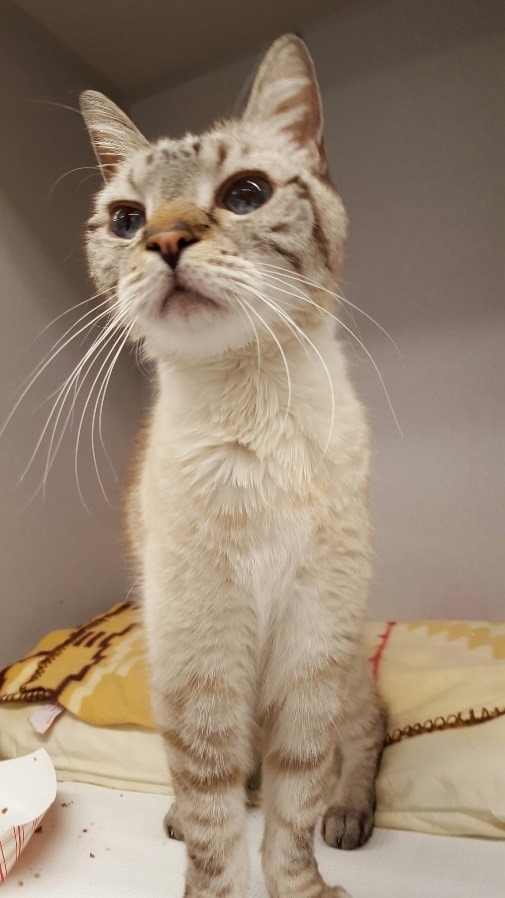
Hyperthyroid Cat
An acute thyrotoxic crisis is called a thyroid storm in human medicine. It is a life-threatening condition requiring emergency treatment. It is often triggered by severe physical or mental stress in thyrotoxic patients. Patients have multiple organ failure as a result of the breakdown of compensatory mechanisms. It is characterized by some or all of the symptoms of neurologic dysfunction (restlessness, delirium, psychosis, somnolence, or coma), fever, tachycardia, heart failure, GI signs, in addition to an elevation of thyroid hormone(s). Mortality rates range from 10-75%.
There is some debate about the use of the term thyroid storm as it is applied to cats. While a thyrotoxic crisis similar to that described above does occur in cats, it is less severe than that seen in humans, and for that reason may (eventually) need a different nomenclature to describe it. But for now the term thyroid storm is what is used.
There are no case reports, case series or retrospectively published papers that describe the condition of feline thyroid storm in a refereed journal. Much if not all of the information about feline thyroid storm that is published in veterinary texts and a few journals is anecdotal, or taken from the human experience with this syndrome. For that reason, there is no clear definition of feline thyroid storm, nor are there any diagnostic criteria that are outlined for it. The diagnosis is predominantly based on clinical characteristics of thyroid storm that are seen in hyperthyroid patients.
Both in humans and in cats there tend to be historical characteristics that suggest or portend a thyroid storm. In cats this is most often stopping the anti-thyroid medication (methimazol) several days or weeks prior, usually by accident. Other triggers include infections, or some stressor (psychological or physical). Aggressive thyroid gland palpation, thyroid gland surgery, and treatment with I131 (disputed by some sources) have also been implicated.
The most commonly identified clinical characteristics of thyroid storm in cats are tachypnea (panting), tachycardia, and hyperactivity. Most cats also will have the typical hyperthyroid appearance of a thin face and body, and a poorly groomed hair coat. Less commonly fever may be noted. A panting cat having the appropriate appearance should immediately create the suspicion of thyroid storm. Most panting cats with thyroid storm have no pulmonary dysfunction and are not truly dyspneic – but they look it! It can be very hard to determine if a thyrotoxic panting cat is truly dyspneic without further testing of thoracic radiographs, thoracic ultrasound, or echocardiography.
Initial and most important diagnostic steps are a T4 and thoracic radiographs. Treatment is usually initiated in the absence of T4 results unless it can be measured quickly as is the case with some in-house machines. Thoracic radiographs are usually normal despite the clinical appearance of dyspnea, and will help to rule-in thyroid storm and rule-out causes of dyspnea. Some cats will have concurrent heart failure due to the thyrotoxic heart disease – but that is less common. Ideally, a CBC/chemistry/UA will also be performed to try to identify a triggering cause if none is clearly evident. Full labs can be done the next day when the immediate crisis is under control if additional sample collection is too stressful for the patient.
The goals of treatment are 1) reduce production/secretion of thyroid hormones, 2) counteract the effects of thyroid hormone, 3) provide systemic support, and 4) identify and correct the triggering factor.
The mainstay of therapy is oral methimazole and a ß-blocker. Improvement is usually seen within hours of starting this treatment. Methimazole is usually given at 5mg/cat BID, but in small cats or if renal dysfunction is present 2.5mg BID can be used. Methimazole will stop the production of new thyroid hormone from the thyroid gland, but will not prevent release of already made thyroid hormone from the gland. In human medicine, the latter source of thyroid hormone is routinely curtailed by giving iodine compounds an hour after methimazole is given. This has also been advocated in cats, but is rarely necessary given the rapid response to methimazole and a ß-blocker. Iodine can be given as iopanoic acid and diatrizoate meglumine (both iodinated radiographic contrast media) at 100mg PO BID for this purpose. IV administration is also possible but needs to be done with care since they are hyperosmolar compounds. The ß-blocker helps control the accelerated heart rate, and calm the patient. A ß-blocker is contraindicated though if the patient is in heart failure. Atenolol is widely available in many hospitals and is usually dosed at 1mg/kg or 6.25mg/cat PO SID-BID in the initial crisis. Propranolol 2.5-5mg/cat PO TID or 0.02mg/kg IV TID is also a reasonable option. The fast acting Esmolol can be given IV at 10-200mcg/kg/min. Despite the appearance of dyspnea, oxygen therapy is not needed if there is no pulmonary disease. Additionally, the sound of the oxygen compressor of an oxygen cage can sometimes create extra stress for these edgy cats. IV fluid may be needed in some cases, but that choice should be made based on hydration status and lab work. If a triggering illness is identified, that should also be treated, but that is not necessary to get the crisis under control in the emergent setting.
The prognosis for feline patients with thyroid storm is very good. I have not seen patients die from this problem who have been treated appropriately. Improvement is usually noted within a few hours of oral therapy, and most patients feel quite normal within 24 hours. The grave consequences that are identified in human medicine are not seen with cats in our experience.
Esophagostomy Tube (E-tube)
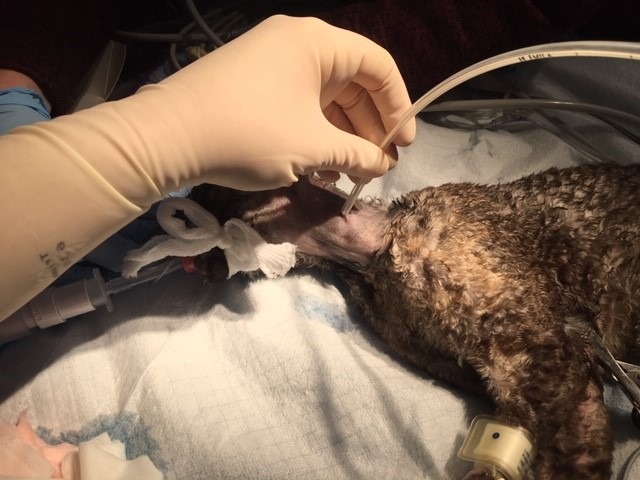
Placement of E-tube
When a patient is unable or unwilling to eat for a prolonged period a temporary feeding tube is indicated to supply enteral nutrition until the patient heals and can again resume eating. A number of tubes and tube locations can be used, and each one comes with pros and cons. We most commonly use naso-esophageal/gastric tubes in our CCU. These tubes are technically easy to place, require little or no sedation, and are inexpensive. Unfortunately, they can only be managed easily in the hospitalized patient, require a liquid diet that always results in a liquid stool, and can only practically be used for <5 days in most cases because of annoyance and irritation to the patient. Gastric tube (surgically placed or percutaneously placed endogastric tubes – PEG tube) are very durable and well tolerated, and a standard canned diet can be fed. But gastric tubes require anesthesia and a certain degree of expertise to place. They also create some risk of peritonitis if the tube is dislodged, becomes infected or is removed before a stoma forms (7-10 days). Jejunostomy tubes are very specialized tubes that bypass the esophagus and stomach which is ideal for upper GI problems of the esophagus/stomach/pancreas, but they are quite challenging to place and to maintain and they do require a liquid diet. Although I could not say that an esophagostomy tube is the ‘best’ tube since it depends on the patient and the problem, esophagostomy tubes do have some of the positive characteristics of the other tube types that make them fairly practical in many situations.
Esophagostomy tubes are useful for inappetence or structural disease of the oropharyngeal region (tumors/trauma/etc.) that limits eating. An E-tube requires no specialized equipment to place, and placement is technically straight forward. Although anesthesia and endotracheal intubation are required for placement, the procedure is fairly quick. E-tubes can remain in place for weeks or even months, and are easy for owners to maintain, and are very well tolerated by most patients. There is no risk to the patient if the tube is immediately removed after placement. Any standard canned diet can be fed through the E-tube when mixed with water and blended. Liquid medications and water can also be easily given through the tube, making complicated at home medication schemes much easier for an owner than giving all those medications directly orally. E-tubes should not be used for esophageal diseases like esophagitis, megaesophagus or esophageal trauma. A larger recent study identified that about 35% of patients who had E-tubes placed experienced some sort of complication. Complications were most commonly premature dislodgement, followed by infection at the tube insertion site. Tubes were in place for a mean of 11 days (range 1-94 days).
Esophagostomy tubes can be placed in cats or dogs. They are even used in a number of exotic species (turtles, lizards, hedgehogs, etc.). The most common type of E-tube is a simple red rubber feeding tube – usually a 12-18 gauge. Many more specialized E-tubes are available from different manufacturers though. Larger bore tubes are less likely to be vomited up than a thinner more flexible smaller diameter tube. Larger tubes also less apt to become clogged.
Placement Technique:
- The patient should be anesthetized and intubated, and placed in right lateral recumbency. The esophagus runs slightly to the left of midline at this level of the neck making a left sided placement a bit easier – but not essential.
- The desired tube should be measured and marked from the likely insertion site to about the level of the heart (7th rib or so).
- The left rostral cervical area just caudal to the angle of the jaw is clipped and surgically prepped.
- A curved mosquito hemostat or Kelley clamp is inserted into the mouth and the point of the instrument is used to push the left wall of the esophagus laterally so the hemostat tip can be seen causing a bump when looking at the left neck of the patient. This bump should be dorsal to the jugular vein which is readily visible in most cats and some dogs.
- A scalpel blade is used to cut down onto the tip of the instrument. The incision in the skin should be just large enough to get the tip of the hemostat out of the skin.
- Once the tip of the hemostat is protruding through the left side of the neck, the mouth of the instrument is opened and closed a few times to widen the hole. The hole should be made wide enough so that the tube can fit through the hole when it is grasped using the hemostat.
- The hemostat’s mouth is opened and the tip of the tube is grasped firmly with hemostat. The tube is then drawn retrograde into the esophagus of the patient and pulled out the mouth while still holding it fast within the mouth of the hemostat. About 2/3-3/4 of the length of the tube should be drawn out of the mouth.
- The tip of the tube is then redirected down the esophagus and the finger is used to push the bend in the tube down the esophagus as far as possible. Ideally, about ¼-½ the tube would be redirected normograde back down the esophagus. (The flanged end of the tube is still protruding from the insert site and is facing toward the back end of the patient.)
- Gentle traction is then put on the flanged end of the tube and about 1-2” should be drawn out of the insert site. If enough of the tube is directed down the esophagus, this light traction will serve to straighten out the tube and eliminate the 180 degree bend of the tube in the rostral esophagus. It is easy to tell when the bend in the tube is gone and the tube is fully directed normograde since the flanged end of the tube will immediately ‘flip’ toward the front of the patient, and the tip of the tube will be in the mid esophagus.
- The tube is then inserted into the esophagus to the pre-measured depth.
- A finger trap pattern using a nylon suture is used to secure the tube in place. The purse string suture encircling the tube should not be tied too tightly or the pressure will result in necrosis.
- A lateral radiograph of the tube should be taken to assure that the tube is in the right location and inserted to the right depth. The tip of the tube should not go into the stomach. It should end roughly at the level of the heart.
- The portion of the tube that is outside the esophagus can be wrapped in a light bandage, or a manufactured wrap can be bought from one of several manufacturers to protect the tube and keep it from dangling or getting in the way. These premade bandages are definitely worth stocking if you use this type of tube.
- The open end of the tube should be capped with a catheter cap, 3-way stop cock, or a more specialized E-tube plug with a syringe port. Some tubes come with a plug incorporated on the end of the tube.
Chest Wound Management
Chest wounds most commonly occur from bite wounds, and make up about 30% of all chest injuries. In a small retrospective paper evaluating 22 cats that were bitten in the chest by dogs, 11/18 cats had radiographic evidence of pneumothorax, 8/20 cats underwent exploratory thoracic surgery, and there was an overall mortality rate of 27%. The conclusions of this paper suggested that “thoracic exploratory surgery may be necessary, particularly in the presence of pseudo-flail chest, pneumothorax or ⩾3 radiographic lesions.”
The dogma of thoracic (and abdominal) penetrating wounds is that if penetration into the cavity has occurred – thoracic exploratory surgery is indicated. Our experience has been that radiographs can sometimes predict when surgery is indicated, but can never give adequate information to decide that thoracic exploratory surgery is not indicated. A good digital exam under sedation or anesthesia is usually needed to help determine if seemingly superficial wounds may actually enter the thoracic cavity. Due to the crushing trauma that happens with bite wounds, a relatively mild superficial wound may belie the severity of the wounds to the deeper tissue layers, or even intrathoracically. Although other causes of penetrating thoracic trauma do occur (cuts or punctures from sharp objects) they tend to be less severe than bite wounds due to the lack of crushing trauma. The information gained from bite wound trauma does largely translate to other types of thoracic trauma.

Chest wound from stick (Photo Courtesy of Dr. Roxanna Khorzad)
If it is clear that thoracic penetration has occurred, but the patient is not dyspneic, some method of keeping the chest wound closed to prevent development of a pneumothorax should be taken before exploratory surgery can be pursued. This may mean simply applying a water based jelly to the wound and bandaging the affected area to exert a bit of pressure on the damaged tissues. Sometimes, rough coaptation of skin and muscle with a staple gun can be a very efficient way to temporarily close a large defect before thoracic surgery or referral can be achieved. If it is clear that a clinically significant pneumothorax has developed, then a temporary chest tube should be placed prior to temporarily closing the defect. A simple red rubber tube of 8-14 fr works well for this purpose and can be simply laid thru the thoracic defect into the thorax prior to temporary closure. Once the tissues are opposed, any air in the chest should be suctioned out to re-expand the lungs. Frequent reaspiration of air from the thorax should be attempted since a temporary closure is likely not fully air tight. Remember that the goal is to improve the patient’s ability to breathe and make them stable for anesthesia or transport. The goal is not to immediately fix the problem fully – that can be done in a more controlled setting later.
Thoracic impalement with sticks or other sharp objects is not common, but this situation does require some non-intuitive decision making in the initial stabilization phase. Most impaled patients are relatively stable. This likely is because those that are most severely compromised do not survive transport to a veterinarian. For sure, the knee jerk response is to immediately remove the impaling object. This temptation should be resisted. Patient comfort to prevent struggling and facilitate handling or even immediate anesthesia are the most important first steps. Although not ubiquitously available, a CT scan of the affected area is the most effective way to identify the extent of damage and the location of the object prior to surgery. Thoracic or abdominal radiographs will only give a partial understanding of what is happening, but are still worthwhile to pursue if CT is not immediately available. Once the patient is considered safe to handle and there is some understanding of what structures are involved with the impaling object, he/she should be taken to surgery. This is truly an exploratory surgery – and the surgeon needs to be ready for blood loss, ruptured viscera, and contamination. Positive pressure ventilation during anesthesia is likely necessary if thoracic penetration has occurred.
Abdominocentesis
Abdominocentesis is a very simple and safe diagnostic test that yields a huge amount of information about our patients. The near ubiquitous use of abdominal ultrasound has really made abdominocentesis so much easier and more available than it was even 10 years ago.
The first step is to identify or suspect the presence of free abdominal fluid. This can be done by palpating a fluid wave on physical exam, or by identifying fluid on a radiograph or abdominal ultrasound. Although any patient position may be suitable for sampling of abdominal fluid if enough is present (standing, sternal or lateral recumbency), often left lateral recumbency is preferred since it allows for easy and comfortable restraint of the patient, and this position encourages the spleen to sink down and a bit out of the way of collecting a sample. If no ultrasound unit is available to identify a large and available collection of fluid, then a location near the umbilicus just to the left (below) of midline is selected if the patient is in left lateral recumbency. A small square of hair 1”-2” wide should be clipped and prepped. Mild sedation can be helpful in some patients who will not settle down, but a local lidocaine block is rarely needed since the injection of lidocaine is usually more uncomfortable that using a sharp needle to collect fluid. The sample can be collected using a 21g needle, a 3cc syringe with needle attached, or a fenestrated catheter if a therapeutic tap is being performed. The needle should be gently inserted perpendicular to the skin through the skin/fat/muscle and into the abdomen. Avoid inserting the needle too quickly as this can result in puncturing abdominal organs if they are met by the needle. By inserting the needle slowly, the needle will only be inserted as deep as is necessary to collect fluid and if internal organs are contacted, they will hopefully be pushed out of the way rather than punctured or lacerated. If just a needle and no syringe is used, once fluid starts to flow into the hub of the needle it can be sucked out of the hub by a syringe. This technique allows for greater control of the needle in placement and in cases where it needs to be redirected. For larger volume effusions, a 21g needle on a 3ml or 6ml syringe is usually fine. If a therapeutic abdominocentesis is being performed, then using a fenestrated catheter makes the procedure a bit safer, especially if the patient is apt to move a bit during the procedure.
A sample of fluid should be put into a red and a purple top tube. This will allow for culture and biochemical analysis from the red top tube, and cytology and TP analysis from the purple top tube. K2EDTA, the anticoagulant in the purple top tube does have some antibacterial activity which makes culturing fluid from that tube problematic. A fair amount of evaluation and testing of the abdominal fluid can be done in-house – especially in the emergency situation, even before sending the sample to the lab for analysis by a pathologist.
Septic Effusions
- Intracellular bacteria noted on a direct smear or spun sample (no further testing is needed)
- >13,000 nucleated cells
- Effusion glucose >20mg/dl less than blood glucose
- Effusion lactate >2.0 mmol/dl greater than blood lactate
Uroabdomen
- Effusion creat/serum creat >2:1 (100% specific, 86% sensitive)
- Effusion K+/serum K+ >1.4:1 (100% specific, 100% sensitive)
- Effusion creat >4x normal serum creat
(Very high likelihood of uroabdomen if 2 of 3 above criteria are fulfilled)
Bile Peritonitis
- Effusion bili:serum bili >2:1
FIP
- Effusion total protein >4.5 g/dL (usually)
- Effusion alb:glob ratio <0.9
- FCoV antibodies >1:1,600
- Effusion gamma-glob concentration >1.0 g/dL
- FCoV PCR of effusion
Chyle
- Effusion triglyceride > serum triglyceride
- Effusion triglyceride > effusion cholesterol
- Effusion triglyceride >100 mg/dL